Creating User Interfaces
Table of contents
The RUI library provides two methods for designing the user interface of an application - either through text resource files or by using APIs. To illustrate this, let's create two examples of a login page, with each example using a different approach.
Create from resources
To design the user interface using text resource files, we need to create a text file that uses a data format that is similar to JSON. Depending on complexity of the user interface, description can be divided into multiple files, with each file representing a different page.
Here is how a login page description in RUI data format will look like:
RUI
// Root container
GridLayout {
    // Occupy all window space
    width = 100%,
    height = 100%,

    // Place content at the center
    cell-vertical-align = center,
    cell-horizontal-align = center,

    // Use radial gradient as a background
    background = radial-gradient {
        center-x = 50%,
        center-y = 50%,
        radial-gradient-radius = 50%,
        gradient = "lightgray 0%, black 100%",
    },

    // Container's content
    content = [

        // Layout content vertically
        ListLayout {
            orientation = up-down,

            // Space between content items
            gap = 1em,

            // Container's content
            content = [

                // User name input field
                EditView {
                    id = username,
                    hint = "User name",
                    radius = 1em,
                    padding = 0.3em,
                    border = _{
                        style = none,
                    },
                },

                // Password input field
                EditView {
                    id = password,
                    hint = "Password",
                    radius = 1em,

                    // Input field used as a password entry
                    edit-view-type = password,

                    padding = 0.3em,
                    border = _{
                        style = none,
                    },
                },

                // Login button
                Button {
                    id = login,
                    content = "Login",
                    radius = 1em,
                },
            ],
        },
    ],
}
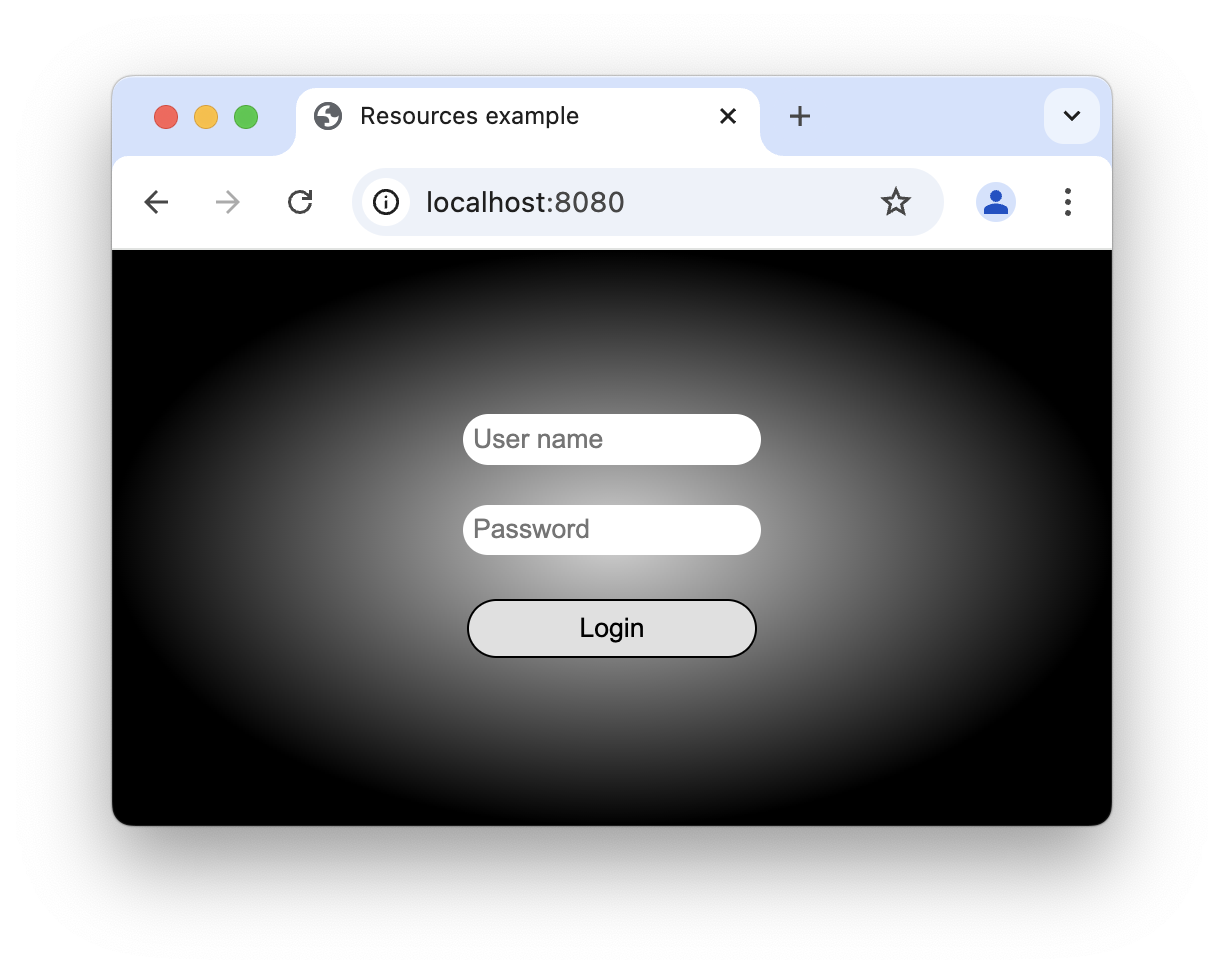
The root container is a GridLayout with a radial gradient background that occupies the entire window.
It has only one child, which is a ListLayout, centered in the application window.
The ListLayout contains three UI controls for entering user name, password, and a button for logging in action.
To use this description file, we need to create a resource folder structure that is supported by the RUI library. Let's create a "resources" folder in our project directory and place the "views" folder inside it. Then, save the UI description file as "loginPage.rui" in the "views" folder.
Now let's create application "main.go" file.
To be able to use our resources in RUI library we have to embed them into the application binary using embed Go package:
Go
package main

import "embed"

//go:embed resources
var resources embed.FS
Then add a skeleton of the application which will initialize RUI library and add realization of SessionContent interface:
Go
// Import RUI library
import (
    "github.com/anoshenko/rui"
)

// Address to listen on
const address = "localhost:8080"

type appSession struct {
}

func (app *appSession) CreateRootView(session rui.Session) rui.View {

    // Create root view of the app from loginPage.rui file
    view := rui.CreateViewFromResources(session, "loginPage")

    return view
}

func createSession(session rui.Session) rui.SessionContent {
    return new(appSession)
}

func main() {
    // Include embedded resources folder with our "views/loginPage.rui" file
    rui.AddEmbedResources(&resources)

    // Initialize RUI library and wait for incoming connections
    rui.StartApp(address, createSession, rui.AppParams{
        Title: "Resources example",
    })
}
In the main() function, we called rui.AddEmbedResources() to add embedded resources to the list of resources used by the RUI library.
This allows us to reference them when creating the user interface.
When a client requests our application's page, we will call rui.CreateViewFromResources() with the name of our "loginPage.rui" file.
The library will parse this file and create all the hierarchy of UI controls described in it.
After launching our application and navigating to localhost:8080 page we will have:

Create from source code
Another way to design the user interface is by using the types and functions provided by the RUI library.
Lets create a new project and populate our "main.go" file:
Go
package main

// Import RUI library
import (
    "github.com/anoshenko/rui"
)

// Address to listen on
const address = "localhost:8080"

type appSession struct {
}

func (app *appSession) CreateRootView(session rui.Session) rui.View {

    // Create root view
    view := rui.NewGridLayout(session, rui.Params{
        // Occupy all window space
        rui.Width:               rui.Percent(100),
        rui.Height:              rui.Percent(100),

        // Place content at the center
        rui.CellVerticalAlign:   rui.CenterAlign,
        rui.CellHorizontalAlign: rui.CenterAlign,

        // Use radial gradient as a background
        rui.Background: rui.NewBackgroundRadialGradient(rui.Params{
            rui.CenterX:              rui.Percent(50),
            rui.CenterY:              rui.Percent(50),
            rui.RadialGradientRadius: rui.Percent(50),
            rui.Gradient: []rui.GradientPoint{
                {Offset: 0, Color: rui.LightGray},
                {Offset: 1, Color: rui.Black},
            },
        }),

        // Container's content
        rui.Content: rui.NewListLayout(session, rui.Params{
            // Layout content vertically
            rui.Orientation: rui.TopDownOrientation,

            // Space between content items
            rui.Gap:         rui.Em(1),

            // Container's content
            rui.Content: []rui.View{
                // User name input field
                rui.NewEditView(session, rui.Params{
                    rui.ID:      "username",
                    rui.Hint:    "User name",
                    rui.Radius:  rui.Em(1),
                    rui.Padding: rui.Em(0.3),
                    rui.Border: rui.NewBorder(rui.Params{
                        rui.Style: rui.NoneLine,
                    }),
                }),

                // Password input field
                rui.NewEditView(session, rui.Params{
                    rui.ID:           "password",
                    rui.Hint:         "Password",
                    rui.Radius:       rui.Em(1),

                    // Input field used as a password entry
                    rui.EditViewType: rui.PasswordText,
                    rui.Padding:      rui.Em(0.3),
                    rui.Border: rui.NewBorder(rui.Params{
                        rui.Style: rui.NoneLine,
                    }),
                }),

                // Login button
                rui.NewButton(session, rui.Params{
                    rui.ID:      "login",
                    rui.Content: "Login",
                    rui.Radius:  rui.Em(1),
                }),
            },
        }),
    })

    return view
}

func createSession(session rui.Session) rui.SessionContent {
    return new(appSession)
}

func main() {
    // Initialize RUI library and wait for incoming connections
    rui.StartApp(address, createSession, rui.AppParams{
        Title: "UI made from code",
    })
}
In the code above, we didn't embed any resources in our app, so there is no need to add them using rui.AddEmbedResources().
All UI controls were described in the CreateRootView() method.
To create any UI control, we can use methods of the form rui.New<UIControlName>, such as rui.NewGridLayout(), rui.NewListLayout(), rui.NewEditView(), and rui.NewButton() in our example.
These methods take two parameters of type Session and Params - which are used to create UI controls in response to client requests.
We already covered Session in Client Session tutorial, lets have a look at Params type:
Go
type Params map[PropertyName]any
This is a type that describes the properties of UI controls.
Each property has a name, which is a text value, and a value of any type.
For convenience Params has several methods which simplifies the access and operations on the map like Set(), Get(), Remove(), Clear(), and AllTags().
RUI library has an extensive Reference documentation that outlines which properties are available for a particular UI control and what data can be written to them.
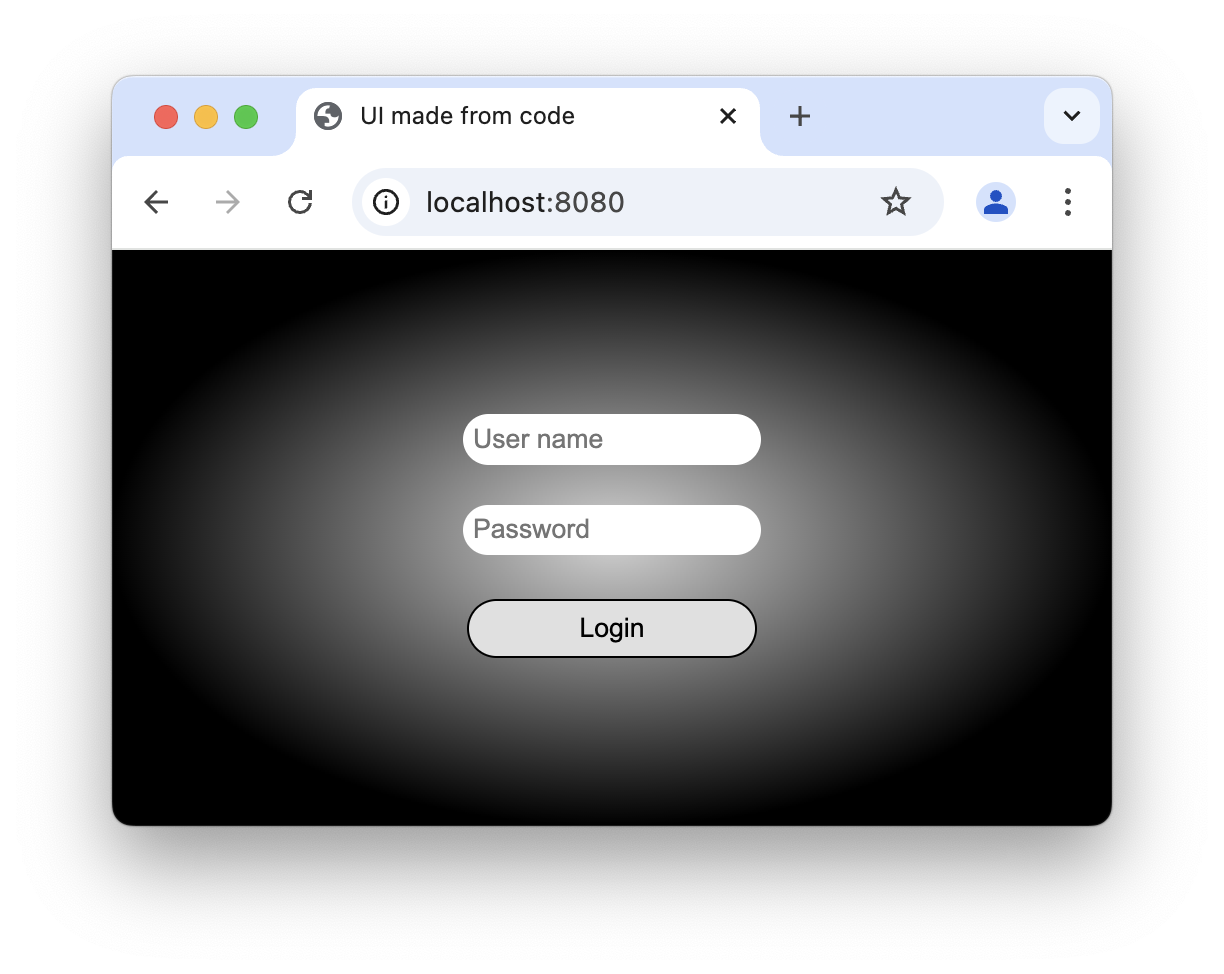
After launching our application and navigating to localhost:8080 we will see a login page with three UI controls for entering user name, password, and a button for logging in:

Available UI controls
RUI library has a wide variety of UI controls(Views) which can be created either from source code or resource files:
| UI Control | Description |
|---|---|
AudioPlayer |
A control for playing and managing audio files |
CanvasView |
A view that displays a canvas for drawing or painting |
ColorPicker |
A control for selecting colors from a palette |
DatePicker |
A control for selecting dates from a calendar |
DropDownList |
A list of options that can be selected by the user |
EditView |
A view that allows users to input and edit text |
FilePicker |
A control for selecting files from the client's device |
ImageView |
A view that displays an image |
NumberPicker |
A control for selecting numbers |
Popup |
A dialog window that appears above other controls |
ProgressBar |
A bar that indicates progress towards a goal or task |
SvgImageView |
A view that displays an SVG image |
TextView |
A control for displaying text |
TimePicker |
A control for selecting times |
VideoPlayer |
A control for playing and managing video files |
| Container | Description |
|---|---|
AbsoluteLayout |
A layout that positions views absolutely on the screen |
Button |
A clickable control for displaying text or other controls |
Checkbox |
A toggleable control used to select or deselect an option |
ColumnLayout |
A layout that arranges views in columns |
DetailsView |
A collapsible view that displays a caption and detailed information |
GridLayout |
A layout that arranges views in a grid |
ListLayout |
A layout that arranges views in a list either horizontally or vertically |
ListView |
A control for displaying and managing dynamic lists of data |
Resizable |
A view that can be resized by the user |
StackLayout |
A layout that stacks views on top of each other |
TableView |
A control for displaying and managing dynamic tables of data |
TabsLayout |
A layout that displays tabs for switching between views |
Fill free to check them out in Reference documentation.

