

View Events
Table of contents
Views are designed to provide an interactive experience for users. For this purpose each view has different kinds of events. These events help the program respond to various user interactions with the views such as keyboard presses, mouse clicks or movements, touch gestures, and changes in window size or scrolling. Keyboard events allow views to react to keystrokes, enabling users to input text or navigate through the application using their keyboard. Focus events are used to track when a user has shifted focus from one control to another, allowing for proper tab ordering and accessibility. Mouse events help controls respond to mouse clicks or movements. Pointer events allow for touch gestures recognition on devices that support it. Resize event is fired when the window or viewport changes size, enabling the program to update its layout accordingly. Scroll event occurs when a user scrolls through content using their mouse or finger, allowing the control to keep track of where the user is in relation to the content and adjust accordingly. Overall, these events provide an essential layer of interactivity between users and applications, enabling them to respond quickly and appropriately to various forms of input.
Events are part of the view properties system. The only difference is that the internal values of such properties are an arrays of function handlers. When setting event properties library allows to use a different types of function handlers, as well as assigning a single function as a handler. In this case library will wrap the value to its internal representation.
There is no way to define event handlers in resource files. When UI has been constructed either from resource file or from code we have to get the reference to the view and then set handler function(s) as an event property value.
View must be in the focus to be able to receive an events. This behavior can be adjusted by "focusable" property of the view. By default not all views can receive the focus.
If we no longer need to receive an events from the view we can remove all handlers using Set() function with nil as a property value or set the view to not receive the focus.
Keyboard events
Two kinds of keyboard events can be generated for the view that has received an input focus.
| Property | Description |
|---|---|
| "key-down-event" | The key has been pressed |
| "key-up-event" | The key has been released |
The value of such properties is an array of functions which has the following format:
Go
func(rui.View, rui.KeyEvent)
where the second argument is the structure which describes the parameters of the key pressed.
Below is an explanation of each KeyEvent member.
| Field | Type | Description |
|---|---|---|
| TimeStamp | uint64 |
The time when event was generated (in milliseconds). The starting point depends on the browser implementation (EPOCH, browser launch, etc.) |
| Key | string |
The value of the key for which the event has been occurred. The value is returned taking into account the current language and case |
| Code | string |
The key code of the represented event. The value is independent of the current language and case |
| Repeat | bool |
Repeated pressing. The key was pressed until its input began to be automatically repeated |
| CtrlKey | bool |
The "Ctrl" key was active when the event has been occurred |
| ShiftKey | bool |
The "Shift" key was active when the event has been occurred |
| AltKey | bool |
The "Alt" ("Option" or "⌥" in OS X) key was active when the event has been occurred |
| MetaKey | bool |
The "Meta" key (for Mac, this is the "⌘" Command key; for Windows, the Windows key "⊞") was active when the event has been occurred |
Library permit assigning other types of handlers:
Go
// An array of listeners
[]func(rui.KeyEvent)
[]func(rui.View)
[]func()

// A single listener
func(rui.KeyEvent)
func(rui.View)
func()
To get the value of the properties we can use Get() or rui.GetKeyDownListeners() and rui.GetKeyUpListeners() functions.
Examples
Assigning a keyboard event handler when UI described in the resource file.
RUI
AbsoluteLayout {
    id = "game",
    width = 100%,
    height = 100%,
    focusable = true,
    content = CanvasView {
        id = "game-canvas",
        top = 0,
        left = 0,
        width = 100%,
        height = 100%,
    }
}
Go
if layout := rui.ViewByID(rootView, "game"); layout != nil {
    // Setting key down event handler
    layout.Set(rui.KeyDownEvent, keyPressed)
}
Setting keyboard event handler during UI creation from code.
Go
view := rui.NewAbsoluteLayout(session, rui.Params{
    rui.ID:           "game",
    rui.Width:        rui.Percent(100),
    rui.Height:       rui.Percent(100),
    rui.Focusable:    true,
    rui.KeyDownEvent: keyPressed, // Setting key down event handler
    rui.Content: rui.NewCanvasView(session, rui.Params{
        rui.ID:              "game-canvas",
        rui.Top:             0,
        rui.Left:            0,
        rui.Width:           rui.Percent(100),
        rui.Height:          rui.Percent(100),
    }),
})
Keyboard event handler function.
Go
func keyPressed(view rui.View, event rui.KeyEvent) {
    switch event.Code {
    case rui.ArrowLeftKey:
        // Do something
    case rui.ArrowRightKey:
        // Do something
    case rui.ArrowUpKey:
        // Do something
    case rui.ArrowDownKey:
        // Do something
    }
}
Focus events
Focus events are fired when the view gains or loses an input focus. To receive such notifications we've to assign handlers to the following view properties.
| Property | Description |
|---|---|
| "focus-event" | View receives an input focus (become active) |
| "lost-focus-event" | View loses an input focus (become inactive) |
The value of such properties is an array of functions with the following signature:
Go
func(rui.View)
Library permit assigning other types of handlers:
Go
[]func()
func()
To get the value of the properties we can use Get() or rui.GetFocusListeners() and rui.GetLostFocusListeners() functions.
Example
Show the hint of current and max amount of characters in the edit view when it has focus.
Go
view := rui.NewListLayout(session, rui.Params{
    rui.Width:  rui.Percent(50),
    rui.Height: rui.Percent(50),
    rui.Content: rui.NewAbsoluteLayout(session, rui.Params{
        rui.Width:  rui.Percent(100),
        rui.Height: rui.Percent(100),
        rui.Content: []rui.View{
            // EditView
            rui.NewEditView(session, rui.Params{
                rui.Width:                rui.Percent(50),
                rui.Height:               rui.Percent(50),
                rui.EditViewType:         rui.MultiLineText,
                rui.FocusEvent:           onFocusGained, // Focus event handler
                rui.LostFocusEvent:       onFocusLost,   // Lost focus event handler
                rui.EditTextChangedEvent: onTextChanged,
            }),
            // Semi-transparent counter at the bottom-right corner of the edit view
            rui.NewTextView(session, rui.Params{
                rui.ID:              "counter",
                rui.BackgroundColor: "#DEFFFFFF",
                rui.Bottom:          rui.Percent(50),
                rui.Right:           rui.Percent(50),
                rui.Text:            "0/100",
                rui.Visibility:      rui.Invisible,
            }),
        },
    }),
})
Handlers of the events.
Go
func onFocusGained(view rui.View) {
    if view := rui.ViewByID(view.Session().RootView(), "counter"); view != nil {
        view.Set(rui.Visibility, rui.Visible)
    }
}

func onFocusLost(view rui.View) {
    if view := rui.ViewByID(view.Session().RootView(), "counter"); view != nil {
        view.Set(rui.Visibility, rui.Invisible)
    }
}

func onTextChanged(view rui.EditView, newText, oldText string) {
    if view := rui.ViewByID(view.Session().RootView(), "counter"); view != nil {
        view.Set(rui.Text, fmt.Sprintf("%d/%d", len(newText), 100))
    }
}
Here is how it will look like when the edit view is selected and contains some text.
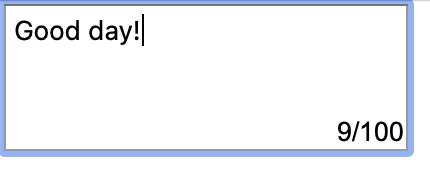
When edit view will loose the focus, counter will gone.

Mouse events
Mouse events are important for creating interactive user interfaces that respond to user input, allowing applications to perform actions associated with clicks or cursor movements and change the appearance or behavior of elements based on where the user's cursor is located. Each view has a variety of mouse events which we can handle. Below is the list of related view properties.
| Property | Description |
|---|---|
| "mouse-down" | The mouse button was pressed |
| "mouse-up" | The mouse button has been released |
| "mouse-move" | Mouse cursor moved |
| "mouse-out" | The mouse cursor has moved outside the view, or entered the child view |
| "mouse-over" | The mouse cursor has moved within the area of the view |
| "click-event" | There was a mouse click |
| "double-click-event" | There was a double mouse click |
| "context-menu-event" | The right mouse click has been pressed |
Each property accept an array of handler functions each of which has the following format:
Go
func(rui.View, rui.MouseEvent)
where the second argument describes the parameters of the mouse event.
Below is the full list of the MouseEvent structure members.
| Member | Type | Description |
|---|---|---|
| TimeStamp | uint64 |
The time the event was created (in milliseconds). The starting point depends on the browser implementation (EPOCH, browser launch, etc.) |
| Button | int |
The number of the mouse button which triggered this event |
| Buttons | int |
Bitmask showing which mouse buttons were pressed when the event occur |
| X | float64 |
The horizontal position of the mouse pointer relative to the origin view |
| Y | float64 |
The vertical position of the mouse pointer relative to the origin view |
| ClientX | float64 |
The horizontal position of the mouse pointer relative to the upper left corner of the application |
| ClientY | float64 |
The vertical position of the mouse pointer relative to the upper left corner of the application |
| ScreenX | float64 |
The horizontal position of the mouse pointer relative to the upper left corner of the screen |
| ScreenY | float64 |
The vertical position of the mouse pointer relative to the upper left corner of the screen |
| CtrlKey | bool |
The "Ctrl" key was active when the event occur |
| ShiftKey | bool |
The "Shift" key was active when the event occur |
| AltKey | bool |
The "Alt" (Option or ⌥ in OS X) key was active when the event occur |
| MetaKey | bool |
The "Meta" key (for Mac this is the ⌘ Command key, for Windows is the Windows key ⊞) was active when the event occur |
Here are the possible values for the "Button" member:
| Value | Constant | Description |
|---|---|---|
| less than 0 | No buttons has been pressed | |
| 0 | rui.PrimaryMouseButton |
Main button. Usually the left mouse button (can be changed in the OS settings) |
| 1 | rui.AuxiliaryMouseButton |
Auxiliary button (wheel or middle mouse button) |
| 2 | rui.SecondaryMouseButton |
Secondary button. Usually the right mouse button (can be changed in the OS settings) |
| 3 | rui.MouseButton4 |
Fourth mouse button. Usually the browser's "Back" button |
| 4 | rui.MouseButton5 |
Fifth mouse button. Usually the browser "Forward" button |
The "Buttons" member is a bit mask combining (using OR) the following values:
| Value | Constant | Description |
|---|---|---|
| 1 | rui.PrimaryMouseMask |
Main button |
| 2 | rui.SecondaryMouseMask |
Secondary button |
| 4 | rui.AuxiliaryMouseMask |
Auxiliary button |
| 8 | rui.MouseMask4 |
Fourth button |
| 16 | rui.MouseMask5 |
Fifth button |
When assigning handler functions library allows to use a shorter variants of the handler functions:
Go
func(rui.MouseEvent)
func(rui.View)
func()
They will be wrapped using the main handler function signature internally.
The corresponding global functions can be used to get back the listeners set: GetMouseDownListeners, GetMouseUpListeners, GetMouseMoveListeners, GetMouseOverListeners, GetMouseOutListeners, GetClickListeners, GetDoubleClickListeners, GetContextMenuListeners.
Check View reference documentation to get more details.
Example
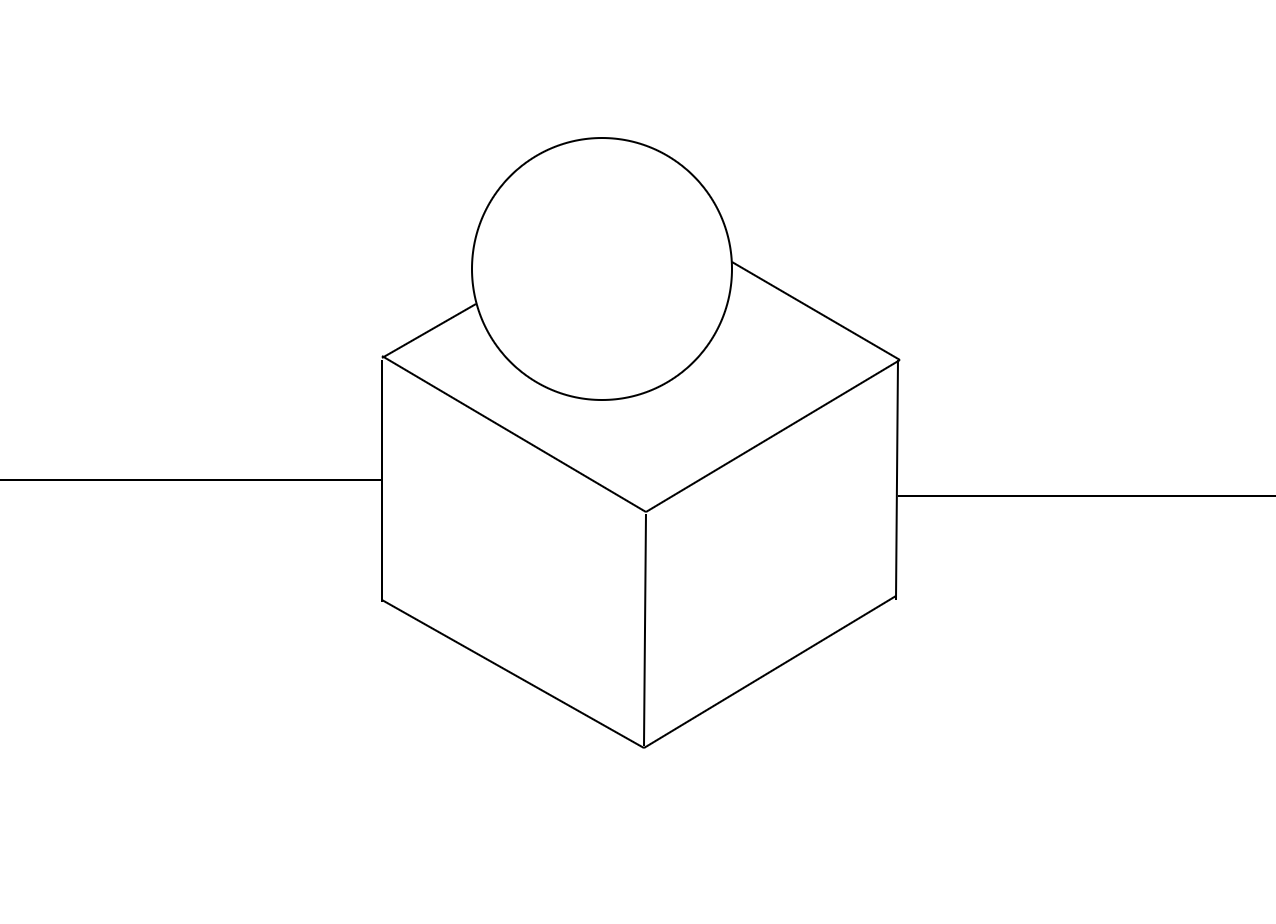
In this example we'll demonstrate on how to use mouse events by implementing a simple drawing application.
First lets define and declare types and variables we'll be using:
Go
// Operations
const (
    ClearScreen = iota
    DrawLine
    DrawRectangle
    DrawEllipse
)

type Point struct {
    X, Y float64 // Point coordinates
}

type Path struct {
    Type  int   // Path type
    Start Point // Path start point
    End   Point // Path end point
}

var drawing bool              // Whether the drawing operation is in progress
var operation int             // The current tool action
var canvasView rui.CanvasView // Main drawing window
var paths []Path              // Collection of paths
Then we need to create a main view of the application.
Since our goal is to draw on the screen we'll utilize CanvasView control which will occupy all screen space:
Go
canvasView = rui.NewCanvasView(session, rui.Params{
    rui.Width:            rui.Percent(100),
    rui.Height:           rui.Percent(100),
    rui.DrawFunction:     draw,      // Set function which will draw our paths
    rui.ContextMenuEvent: showMenu,  // Set handler to show context menu
    rui.MouseDown:        mouseDown, // Set handler for mouse down events
    rui.MouseUp:          mouseUp,   // Set handler for mouse up events
    rui.MouseMove:        mouseMove, // Set handler for mouse move events
})

// Initialize paths to be drawn
paths = make([]Path, 0)
Now lets implement a context menu which will be shown when the right mouse button will be clicked.
To show popup menu will be using rui.ShowMenu() function:
Go
// showMenu shows an actions
func showMenu(view rui.View, event rui.MouseEvent) {
    rui.ShowMenu(view.Session(), rui.Params{
        // Aligning popup with mouse pointer
        rui.VerticalAlign:   rui.TopAlign,
        rui.HorizontalAlign: rui.LeftAlign,
        rui.MarginLeft:      event.ClientX,
        rui.MarginTop:       event.ClientY,

        rui.OutsideClose:    true,
        rui.PopupMenuResult: menuSelected, // Set the function for handling popup menu actions
        rui.Items: []string{
            "Clear screen",
            "Draw line",
            "Draw rectangle",
            "Draw ellipse",
        },
    })
}
To handle menu actions we need to write our handler which will set the operation and handle clear screen action:
Go
// menuSelected handles selected menu popup item
func menuSelected(index int) {
    operation = index

    if operation == ClearScreen {
        clear(paths)
        canvasView.Redraw()
    }
}
Now lets define our mouse events handler functions which will check the current operation and create or update the path:
Go
// mouseDown start drawing a path
func mouseDown(view rui.View, event rui.MouseEvent) {
    if operation == ClearScreen {
        return
    }

    if event.Button == rui.PrimaryMouseButton {
        // Add a new path
        paths = append(paths, Path{
            Type: operation,
            Start: Point{
                X: event.ClientX,
                Y: event.ClientY,
            },
            End: Point{
                X: event.ClientX,
                Y: event.ClientY,
            },
        })

        // Start drawing
        drawing = true
    }
}

// mouseUP finalize drawing operation
func mouseUp(view rui.View, event rui.MouseEvent) {
    if !drawing {
        return
    }

    if event.Button == rui.PrimaryMouseButton {
        // Update recent path and re-draw the canvas view
        if size := len(paths); size > 0 {
            lastPath := paths[size-1]
            lastPath.End.X = event.ClientX
            lastPath.End.Y = event.ClientY
            paths[size-1] = lastPath
            canvasView.Redraw()
            drawing = false
            operation = ClearScreen
        }
    }
}

// mouseMove update the path shape
func mouseMove(view rui.View, event rui.MouseEvent) {
    if !drawing {
        return
    }

    // Update recent path
    if size := len(paths); size > 0 {
        lastPath := paths[size-1]
        lastPath.End.X = event.ClientX
        lastPath.End.Y = event.ClientY
        paths[size-1] = lastPath
        canvasView.Redraw()
    }
}
We are almost done, the final thing is to draw all the paths we have in our collection as well as not finished one:
Go
// draw draws all paths from the collection including not finalized paths
func draw(canvas rui.Canvas) {
    for _, v := range paths {
        path := canvas.NewPath()
        switch v.Type {
        case DrawLine:
            path.MoveTo(v.Start.X, v.Start.Y)
            path.LineTo(v.End.X, v.End.Y)
        case DrawRectangle:
            path.MoveTo(v.Start.X, v.Start.Y)
            path.LineTo(v.End.X, v.Start.Y)
            path.LineTo(v.End.X, v.End.Y)
            path.LineTo(v.Start.X, v.End.Y)
            path.Close()
        case DrawEllipse:
            path.Ellipse(
                v.Start.X+(v.End.X-v.Start.X)/2,
                v.Start.Y+(v.End.Y-v.Start.Y)/2,
                math.Abs(v.End.X-v.Start.X)/2,
                math.Abs(v.End.Y-v.Start.Y)/2,
                0,
                0,
                2*math.Pi,
                false,
            )
        }
        canvas.StrokePath(path)
    }
}
After building and running such application we can use a right mouse button to select the tool and use left mouse button to start drawing.
Here is what we've got after playing with this simple drawing application.
Pointer Events
A pointer is a device-independent representation of input devices (such as a mouse, pen, or point of contact on a touch surface). It can point to a specific coordinate (or set of coordinates) on a contact surface such as a screen.
All pointers can generate a several kinds of events, below is a view related properties.
| Property | Description |
|---|---|
| "pointer-down" | The pointer was pressed |
| "pointer-up" | The pointer was released |
| "pointer-move" | The pointer has been moved |
| "pointer-cancel" | Pointer events aborted |
| "pointer-out" | The pointer went out of bounds of the view, or went into the child view |
| "pointer-over" | The pointer is within the limits of the view |
Each property accept an array of handler functions each of which has the following format:
Go
func(rui.View, rui.PointerEvent)
We can use a shorter variants as well if we want to:
Go
func(rui.PointerEvent)
func(rui.View)
func()
where rui.PointerEvent is the structure which describes the parameters of the pointer data and has the following members:
| Member | Type | Description |
|---|---|---|
| PointerID | int |
The unique identifier of the pointer that raised the event |
| Width | float64 |
The width (X-axis value) in pixels of the pointer's contact geometry |
| Height | float64 |
The height (Y-axis value) in pixels of the pointer's contact geometry |
| Pressure | float64 |
Normalized gauge inlet pressure ranging from 0 to 1, where 0 and 1 represent the minimum and maximum pressure that the hardware is capable of detecting |
| TangentialPressure | float64 |
Normalized gauge inlet tangential pressure (also known as cylinder pressure or cylinder voltage) ranges from -1 to 1, where 0 is the neutral position of the control |
| TiltX | float64 |
The planar angle (in degrees, ranging from -90 to 90) between the Y – Z plane and the plane that contains both the pointer (such as a stylus) axis and the Y axis |
| TiltY | float64 |
The planar angle (in degrees, ranging from -90 to 90) between the X – Z plane and the plane containing both the pointer (such as a stylus) axis and the X axis |
| Twist | float64 |
Rotation of a pointer (for example, a stylus) clockwise around its main axis in degrees with a value in the range from 0 to 359 |
| PointerType | string |
The type of device that triggered the event: "mouse", "pen", "touch", etc. |
| IsPrimary | bool |
A pointer is the primary pointer of this type |
As usual we can grab the values of such view properties using the following global functions: GetPointerDownListeners, GetPointerUpListeners, GetPointerMoveListeners, GetPointerCancelListeners, GetPointerOverListeners, GetPointerOutListeners.
Touch events
To give end users a more intuitive way of interaction with UI elements on touchscreen enabled devices we can utilize a touch events. They can be used to track a multi-point touches. Single touches also generate a mouse events, therefore if we do not need to track a multi-point touches, then it is easier to use a mouse events instead.
To incorporate touch events into our application we can use the following properties.
| Event | Description |
|---|---|
| "touch-start" | The surface touched |
| "touch-end" | Surface touch completed |
| "touch-move" | One or more touches changed position |
| "touch-cancel" | The touch is interrupted |
The general event listener has the following format:
Go
func(rui.View, rui.TouchEvent)
where the second argument describes the touch parameters. The TouchEvent structure has the following members:
| Member | Type | Description |
|---|---|---|
| TimeStamp | uint64 |
The time the event was created (in milliseconds). The starting point depends on the browser implementation (EPOCH, browser launch, etc.) |
| Touches | []Touch |
An array of appeared touches each represented by a Touch structure |
| CtrlKey | bool |
The Ctrl key was active when the event is occurred |
| ShiftKey | bool |
The Shift key was active when the event is occurred |
| AltKey | bool |
The Alt (Option or ⌥ in OS X) key was active when the event is occurred |
| MetaKey | bool |
The Meta key (for Mac, this is the ⌘ Command key; for Windows, the Windows key ⊞) was active when the event is occurred |
The Touch structure describes a single touch and has the following members.
| Member | Type | Description |
|---|---|---|
| Identifier | int |
A unique identifier assigned to each touch and does not change until it is completed |
| X | float64 |
The horizontal position of the mouse relative to the view origin |
| Y | float64 |
The vertical position of the mouse relative to the view origin |
| ClientX | float64 |
The horizontal position of the mouse relative to the upper left corner of the application |
| ClientY | float64 |
The vertical position of the mouse relative to the upper left corner of the application |
| ScreenX | float64 |
The horizontal position of the mouse relative to the upper left corner of the screen |
| ScreenY | float64 |
The vertical position of the mouse relative to the upper left corner of the screen |
| RadiusX | float64 |
The x-radius of the ellipse, in pixels, that most closely delimits the area of contact with the screen |
| RadiusY | float64 |
The y-radius of the ellipse, in pixels, that most closely delimits the area of contact with the screen |
| RotationAngle | float64 |
The angle (in degrees) to rotate the ellipse clockwise, described by the radiusX and radiusY parameters, to best cover the contact area between the user and the surface |
| Force | float64 |
The amount of pressure from 0.0 (no pressure) to 1.0 (maximum pressure) that the user applies to the surface |
As usual it is not mandatory to utilize the general listener signature all of the time we can also use listeners in the following formats.
Go
func(rui.TouchEvent)
func(rui.View)
func()
To get the list of current assigned listeners we can use a global functions: GetTouchStartListeners, GetTouchEndListeners, GetTouchMoveListeners, GetTouchCancelListeners.
Resize event
While positioning the views on the screen sometimes it is useful to adjust the settings based on dimensions of other UI elements. We can track dimensions of the view using a "resize-event" property. Resize event usually appear when the view changes its position or size.
The property's general value is an array of the listener functions of the following format.
Go
func(rui.View, rui.Frame)
where the Frame is the structure which defines view position and size.
| Member | Type | Description |
|---|---|---|
| Left | float64 |
The recent horizontal offset in pixels relative to the parent view |
| Top | float64 |
The recent vertical offset in pixels relative to the parent view |
| Width | float64 |
The recent width of the visible part of the view in pixels |
| Height | float64 |
The recent height of the visible part of the view in pixels |
If we prefer we can use a shorter variants of the listeners.
Go
func(rui.Frame)
func(rui.View)
func()
To get the current list of resize event handlers we can use a global function GetResizeListeners.
Using resize event is not the only way of getting the view's current visible dimensions.
Each view interface has a dedicated method for that called Frame() or its global counterpart rui.GetViewFrame().
Scroll event
Some dynamic applications may benefit from utilizing a view scroll event either by tracking the user current position on the page or adjusting UI in a visible area. This is done by assigning the listeners to a "scroll-event" property.
The listener formats are identical to what we have for "resize-event" of the view and can describe the view's current visible scroll area position and the overall view size.
The rui.GetScrollListeners() global function can be used to retrieve the listeners.
To get the view current visible position we can also use a Scroll() method of the view interface or its global counterpart function rui.GetViewScroll().
Sometimes it is not enough to know the view scroll position but also to navigate the user to a certain point, specifically when going back using a StackLayout container.
For this purpose a global functions rui.ScrollViewTo(), rui.ScrollViewToStart(), and rui.ScrollViewToEnd() can be used.