Getting Started
Table of contents
Main concepts
Applications built with the RUI library consist of two primary components:
- Server side(business logic)
- Thin browser client(displaying and rendering)

On the server-side, we are responsible for creating UI controls and adding resources such as images, videos, localization files, and implementing business logic, processing client sessions, and reacting to events. The thin browser client is provided by the library and is uploaded every time a user requests a page. It establishes a client session using WebSocket technology to synchronize app state. Additionally, RUI can also work with plain HTTP connections but with limited functionality compared to WebSockets.
Features
RUI provides the following features:
- Graphical User Interface controls, such as
Button,GridLayout,ListViewand others, which can be customized using their properties and themes. - Events processing, where every change made by the client (such as pressing a button or hovering over a specific area) can be processed on the server-side to update app state.
- Themes support with most controls having default style constants that can be overridden. Additionally, there is an automatic way to apply themes based on client settings such as window orientation and size, light/dark mode, and more.
- Localization, which allows for multiple languages to be supported within the app, automatically applied based on the client's (browser) language settings.
- Drawings, with a
CanvasViewcontrol available for creating custom drawings or using SVG code with anSvgImageView. - Animations, where almost any property of controls can participate in animations to engage users.
- Resources, which enable the inclusion of UI controls description, media files (such as images, video, audio), and raw data within a single binary file. There is also an option to provide custom folders for hosting separate files and referencing them dynamically by the library.
- WebAssembly(Wasm) support, applications built with RUI library can be compiled into binary code that can be executed at near-native speeds in the browser.
Setting up environment
To create RUI applications, we need the Go language compiler and associated tools, which can be installed using the official instructions. Once we have these tools set up, we can begin exploring the features of RUI and creating our own UI applications!
Project layout
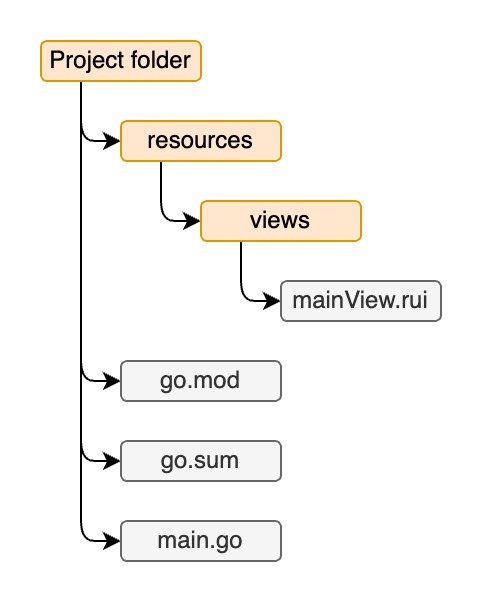
Minimal project layout may look like on the image below and usually varying depending on the project needs.

In our example project, we have a "resources" folder that contains only one main view description file under "views" subfolder. However, in more complex applications, this folder may contain additional resources such as text translations, themes, and other media files. The app's entry point and the bootstrap code for RUI are located in the "main.go" file.
Basic example
Based on a simple project layout lets figure out how to prepare a resources which will be embedded into our app.
mainView.rui file contains a description of the root view for the app, lets use TextView UI control to display a greeting message:
RUI
TextView {
    // ID of the control by which we can reference it through source code
    id = textView,
    text = "Hello world!",
    padding = 50px,
}
File format to describe UI elements is very similar to JSON, but still has some differences. It can even contain comments! To embed this resource into the application binary lets start preparing our main.go source file:
Go
package main

// Import RUI library
import (
    "github.com/anoshenko/rui"
)

import "embed"

//go:embed resources
var resources embed.FS
We imported a RUI library module which we'll use later and prepare a convenient variable for our embedded resources folder.
Now when we are done with preparations lets see how our main entry point looks like and how to setup the RUI library:
Go
// Address to listen on
const address = "localhost:8080"

// Implementation of rui.SessionContent interface
type appSession struct {
    rootView rui.View
}

// Implementation of mandatory rui.SessionContent.CreateRootView() function
func (app *appSession) CreateRootView(session rui.Session) rui.View {

    // Create root view of the app from mainView.rui file
    app.rootView = rui.CreateViewFromResources(session, "mainView")

    return app.rootView
}

// Called every time when a new client has been connected
func createSession(session rui.Session) rui.SessionContent {
    return new(appSession)
}

func main() {
    // Include resources with which RUI library may work with
    rui.AddEmbedResources(&resources)

    // Initialize RUI library and wait for incoming connections
    rui.StartApp(address, createSession, rui.AppParams{
        Title: "RUI example",
    })
}
Here we defined an address on which RUI library will listen for incoming connections.
In our main() function we inform RUI library about our prepared embedded resources which we can refer during creation of our UI elements.
Then invoke rui.StartApp() function to initialize the library and wait for incoming connections.
RUI library require a developer to provide a function which will be called every time when a new client will be connected.
This function must return an implementation of SessionContent interface which will be used by the library to create a UI for the client.
This is done by invoking our implementation of rui.CreateRootView() method.
In this method we've to create and return a view either from resources(rui.CreateViewFromResources()) or using other RUI APIs directly.
When we've done with our code we can test it by invoking:
% go run .
in our projects directory.
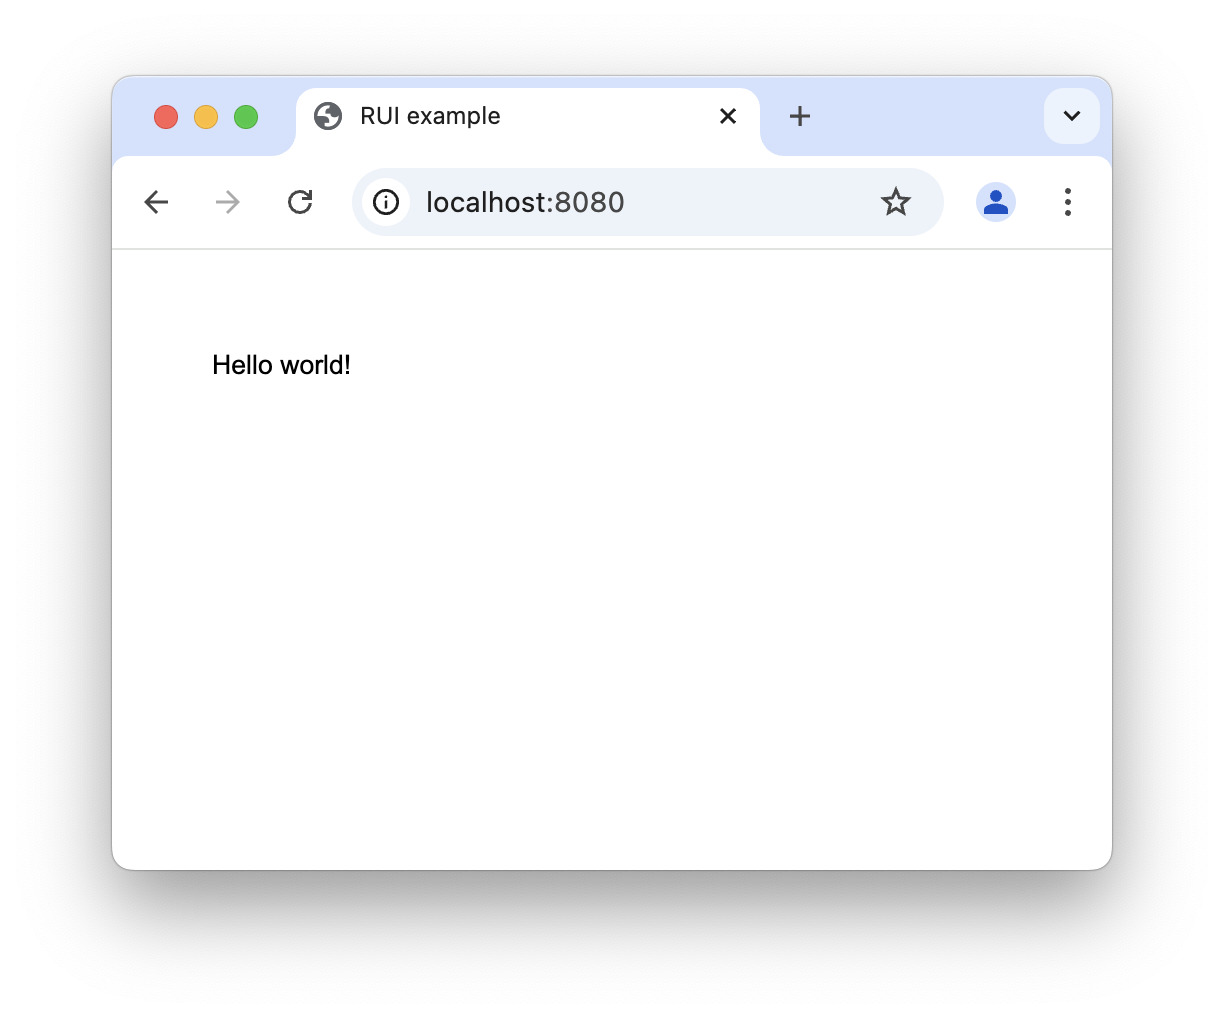
When compile process has been finished and our application started successfully we can navigate to it using our browser by opening http://localhost:8080 page. This is a possible output you may have based on your browser settings:


